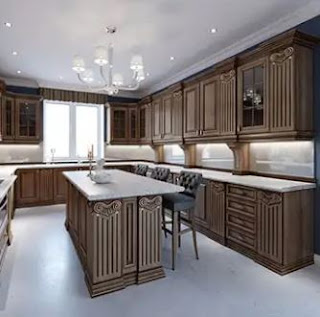
How To Install Kitchen Installation In Toronto
Every kitchen needs cabinets for storing kitchen appliances. You can opt to buy custom-made kitchen cabinets or make them. Custom-made cabinets are a bit expensive, and without the budget, you can make them yourself. However, you need to have the suitable materials and tools to complete the work to do this. Here's all the information on how to install cabinets.
Prepare the Kitchen for
Installation
1.
When installing cabinets do it after wiring and plumbing are
done and before finishing flooring. Installing cabinets before flooring will
help you save on the flooring, and also, new floors won't be at risk of damage.
If you are renovating to remove old cabinets, do it carefully to avoid damaging
the walls.
2.
It will be helpful when you are taking measurements. When
removing old cabinets, remove all doors, pull out the drawers and lift out any
removable shelves. You need a helper to help remove upper cabinets as you extract
the screws.
3.
Also, ensure your walls are level, smooth, and clean before
installing. To check the level, use a long straightedge against them and mark
any bump or void so that you can adjust during installation.
4.
When you have your cabinets, unpack them and ensure all
components are in the package. If you got your Kitchen cabinets from Manufacturersin Ontario, Canada, and they are disassembled, please follow the instructions.
Always add the drawers, doors, and shelves after cabinet installation.
Cabinet Installation
Upper Cabinets
Installation of upper
cabinets takes place before the lower cabinets. It will make it easy for you as
you won't have to work over lower cabinets. When doing kitchen installation in Toronto, you need to assemble the cabinets following the
manufacturer's instructions.
If your cabinets are not
going to sit on the ceiling, you will need to make a line on the wall to fix
the cabinets. You need to measure 36 inches from the floor, then add 18 inches.
It will act as the line to rest the bottom of your cabinets. Make use of a stud
finder and a level to mark each stud. Mark the studs from top to bottom to use
the line as a reference when installing lower cabinets.
You can use two ways to
fasten upper cabinets by simply screwing through the back of the cabinet or a
French cleat. Always use many screws to ensure the cabinets are stable to
withstand heavy kitchenware weight.
Lower Cabinets
After installing the
upper cabinets, it's time for the lower cabinets. Remove all doors, drawers,
and shelves to prevent damage and make the cabinet light. Before installing,
it's good to come up with a layout. Start by laying out all cabinets except the
sink cabinet.
Then get the plumbing
measurement for your sink base and transfer it to the back of the cabinet. Then
using a drill equipped with a hole saw bit or jigsaw to make holes. When done,
push the base into place and shim the studs well to ensure the fronts of the
cabinets are flush with one another.
Then use wedge shims at
every point you have a stud mark and adjust each cabinet's depth till their
fronts align. If they are okay, secure the cabinet together using trigger
clamps and screw the cabinets to one another. Then attach them to the wall and
use a level to check the tops of the front and back of the cabinets.
If there are low spots, use wedge shims on the floor to raise them. Screw your cabinets and adjust the shims one at a time. Finally, you can install your countertops and your appliances. Once you finish installing everything, it's time to attach the doors and any other hardware.


Comments
Post a Comment